목표
- 간단한 로그인 기능을 구현
Spring Security를 사용JPA와MySQL을 사용Mustache템플릿 엔진 사용
MySQL 설치
MySQL 설치는 본 글에서는 다루지 않는다. 아래글 참고
2020/10/30 - [Database/RDB] - MySQL 설치하기 (Mac OSX)
MySQL 설치하기 (Mac OSX)
MySQL 설치 본 글에서는 Homebrew 를 이용하여 MySQL 을 설치한다. $ brew update $ brew install mysql 만약, 특정 버전을 따로 설치하고 싶다면 아래 명령어를 수행한다. 그리고, 원하는 버전의 mysql을 설치한..
memostack.tistory.com
Spring Project 생성
start.spring.io/에서 메이븐 프로젝트를 생성한다.
의존성은 아래 5가지 추가
Spring Boot DevTools: Application을 빠르게 실행할 수 있게해주고, Live Reload 등을 제공해줌 (개발이 편해짐)Lombok: 어노테이션을 사용하여 Getter, Setter, Contructor 등을 생성할 수 있게해줌Spring Security: Spring Security를 사용할 수 있게해줌Spring Web: Spring MVC, RESTful API를 만들수 있게해줌Spring Data JPA: JPA(Java ORM)을 사용할 수 있게 해줌MySQL Driver: MySQL 드라이버Mustache: Mustache 템플릿 엔진을 사용할 수 있음

추가하면 아래 '더보기'와 같이 pom.xml에 dependency가 추가된다. (펼쳐서 확인)
	<dependencies>
		<dependency>
			<groupId>org.springframework.boot</groupId>
			<artifactId>spring-boot-starter-data-jpa</artifactId>
		</dependency>
		<dependency>
			<groupId>org.springframework.boot</groupId>
			<artifactId>spring-boot-starter-mustache</artifactId>
		</dependency>
		<dependency>
			<groupId>org.springframework.boot</groupId>
			<artifactId>spring-boot-starter-security</artifactId>
		</dependency>
		<dependency>
			<groupId>org.springframework.boot</groupId>
			<artifactId>spring-boot-starter-web</artifactId>
		</dependency>

		<dependency>
			<groupId>org.springframework.boot</groupId>
			<artifactId>spring-boot-devtools</artifactId>
			<scope>runtime</scope>
			<optional>true</optional>
		</dependency>
		<dependency>
			<groupId>mysql</groupId>
			<artifactId>mysql-connector-java</artifactId>
			<scope>runtime</scope>
		</dependency>
		<dependency>
			<groupId>org.projectlombok</groupId>
			<artifactId>lombok</artifactId>
			<optional>true</optional>
		</dependency>
		<dependency>
			<groupId>org.springframework.boot</groupId>
			<artifactId>spring-boot-starter-test</artifactId>
			<scope>test</scope>
		</dependency>
		<dependency>
			<groupId>org.springframework.security</groupId>
			<artifactId>spring-security-test</artifactId>
			<scope>test</scope>
		</dependency>
	</dependencies>
application.yml 설정
본 글에서는 application.yml 파일로 설정값을 부여한다. (application.properties를 사용해도 됨. 취향차이)
server:
  port: 8080  # 서버 포트 설정
  servlet:
    context-path: /  # context-path 설정
    encoding:
      charset: UTF-8  # 인코딩 방식 설정
      enabled: true
      force: true

spring:
  datasource:
    driver-class-name: com.mysql.cj.jdbc.Driver  # JDBC 드라이버 정보 설정
    url: jdbc:mysql://localhost:3306/security_db?serverTimezone=Asia/Seoul  # DB 연결 정보 설정
    username: root  # DB 계정 설정
    password: root  # DB 비밀번호 설정

  jpa:
    hibernate:
      ddl-auto: update  # hibernate를 사용해서 DDL을 생성하기 위함.
      naming:
        physical-strategy: org.hibernate.boot.model.naming.PhysicalNamingStrategyStandardImpl
    show-sql: true  # hibernate가 실행한 SQL 쿼리문을 보기 위함
템플릿(Template) 생성
Mustache 템플릿 엔진을 사용해서 템플릿을 생성한다.
View Resolver 생성
우선 기본값을 가지긴 하지만, prefix와 suffix를 설정해줘야 함. (기본 값은 아래와 같다)
prefix: classpath:/templates/suffix: .mustache
본 글에서는 .mustache를 사용하지 않고, .html을 사용할 예정이다. 설정해보자
com.example.security.config.WebMvcConfig.java
package com.example.security.config;

import org.springframework.boot.web.servlet.view.MustacheViewResolver;
import org.springframework.context.annotation.Configuration;
import org.springframework.web.servlet.config.annotation.ViewResolverRegistry;
import org.springframework.web.servlet.config.annotation.WebMvcConfigurer;

@Configuration
public class WebMvcConfig implements WebMvcConfigurer {
  @Override
  public void configureViewResolvers(ViewResolverRegistry registry) {
    MustacheViewResolver mustacheViewResolver = new MustacheViewResolver();
    mustacheViewResolver.setCharset("UTF-8");
    mustacheViewResolver.setContentType("text/html; charset=UTF-8");
    mustacheViewResolver.setPrefix("classpath:/templates/"); // Prefix 설정
    mustacheViewResolver.setSuffix(".html"); // Suffix 설정

    registry.viewResolver(mustacheViewResolver); // 위에서 생성한 Mustache 리졸버를 적용
  }
}
템플릿 생성
총 4개의 페이지를 생성한다.
- 메인(인덱스) 페이지
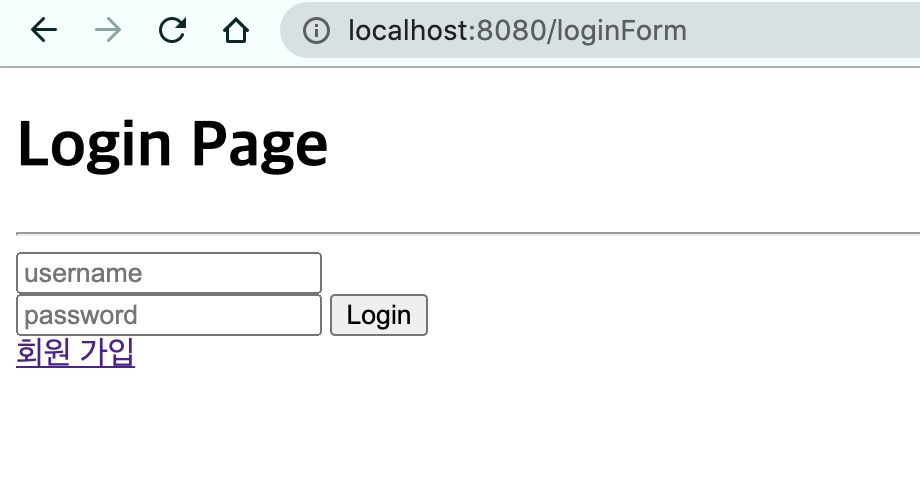
- 로그인 페이지
- 회원가입 페이지
- 유저 페이지
메인(인덱스) 페이지 생성 - resources/templates/index.html
<!DOCTYPE html>
<html lang="ko">
<head>
    <meta charset="UTF-8"/>
    <title>Index Page</title>
</head>
<body>
<h1> Index Page </h1>
</body>
</html>
로그인 페이지 생성 - resources/templates/loginForm.html
<!DOCTYPE html>
<html lang="ko">
<head>
    <meta charset="UTF-8"/>
    <title>Login Page</title>
</head>
<body>
<h1> Login Page </h1>
<hr/>
<form action="/login" method="POST"> <!-- 시큐리티에서 /login을 통해 인증처리를 할 예정 -->
    <input type="text" name="username" placeholder="username" autofocus/>
    <br/>
    <input type="password" name="password" placeholder="password"/>
    <button type="submit">Login</button>
</form>
<a href="/joinForm">회원 가입</a>
</body>
</html>
회원가입 페이지 생성 - resources/templates/joinForm.html
<!DOCTYPE html>
<html lang="ko">
<head>
    <meta charset="UTF-8"/>
    <title>Join Page</title>
</head>
<body>
<h1> Join Page </h1>
<form action="/join" method="POST"> <!-- Controller에서 회원가입 로직을 처리할 예정 -->
    <input type="text" name="username" placeholder="username" autofocus/>
    <br/>
    <input type="password" name="password" placeholder="password"/>
    <br/>
    <input type="text" name="email" placeholder="email"/>
    <br/>
    <button type="submit">가입하기</button>
</form>
<a href="/loginForm">로그인</a>
</body>
</html>
유저 페이지 생성 - resources/templates/user.html
<!DOCTYPE html>
<html lang="ko">
<head>
    <meta charset="UTF-8"/>
    <title>User Page</title>
</head>
<body>
<h1> User Page </h1>
</body>
</html>
컨트롤러(Controller) 생성
페이지를 만들었지만, 아직 Controller를 생성하지 않았기 때문에 만들어준다.
com.example.security.controller.LoginController.java
package com.example.security.controller;

import com.example.security.model.User;
import com.example.security.repository.UserRepository;
import lombok.extern.slf4j.Slf4j;
import org.springframework.beans.factory.annotation.Autowired;
import org.springframework.security.access.annotation.Secured;
import org.springframework.security.access.prepost.PreAuthorize;
import org.springframework.security.crypto.bcrypt.BCryptPasswordEncoder;
import org.springframework.stereotype.Controller;
import org.springframework.web.bind.annotation.GetMapping;
import org.springframework.web.bind.annotation.PostMapping;
import org.springframework.web.bind.annotation.ResponseBody;

@Slf4j
@Controller
public class LoginController {

  @Autowired private UserRepository userRepository; // 글 아래에서 생성할 예정
  @Autowired private BCryptPasswordEncoder passwordEncoder; // 시큐리티에서 빈(Bean) 생성할 예정

  /**
   * 인덱스 페이지
   *
   * @return
   */
  @GetMapping({"", "/"})
  public String index() {
    return "index";
  }

  /**
   * 유저 페이지
   *
   * @return
   */
  @GetMapping("user")
  public String user() {
    return "user";
  }

  /**
   * 로그인 폼 페이지
   *
   * @return
   */
  @GetMapping("loginForm")
  public String loginForm() {
    return "loginForm";
  }

  /**
   * 회원 가입 페이지
   *
   * @return
   */
  @GetMapping("joinForm")
  public String joinForm() {
    return "joinForm";
  }

  /**
   * 회원 가입이 실행되는 부분
   *
   * @param user
   * @return
   */
  @PostMapping("join")
  public String join(User user) {
    user.setRole("ROLE_ADMIN"); // 권한 정보는 임시로 ROLE_ADMIN으로 넣는다.
    user.setPassword(passwordEncoder.encode(user.getPassword()));
    userRepository.save(user);
    return "redirect:/loginForm";
  }
}
User 객체 생성
com.example.security.model.User.java
package com.example.security.model;

import lombok.*;
import lombok.experimental.Accessors;
import org.hibernate.annotations.CreationTimestamp;

import javax.persistence.Entity;
import javax.persistence.GeneratedValue;
import javax.persistence.GenerationType;
import javax.persistence.Id;
import java.time.LocalDateTime;

@Entity
@ToString
@Getter
@Setter
@Builder
@NoArgsConstructor
@AllArgsConstructor
public class User {
  // PK
  @Id
  @GeneratedValue(strategy = GenerationType.IDENTITY)
  private long id;

  // 사용자명
  private String username;

  // 비밀번호
  private String password;

  // 이메일
  private String email;

  // 권한
  private String role;

  // 계정 생성일
  @CreationTimestamp private LocalDateTime createdDate;
}
UserRepository 생성
com.example.security.repository.UserRepository.java
package com.example.security.repository;

import com.example.security.model.User;
import org.springframework.data.jpa.repository.JpaRepository;
import org.springframework.stereotype.Repository;

import java.util.Optional;

@Repository
public interface UserRepository extends JpaRepository<User, Long> {

  // username을 가지고 User 정보를 가져올 수 있게 메소드 생성
  Optional<User> findByUsername(String username);
}
SecurityConfig 생성
com.example.security.config.SecurityConfig.java
package com.example.security.config;

import org.springframework.context.annotation.Bean;
import org.springframework.context.annotation.Configuration;
import org.springframework.security.config.annotation.web.builders.HttpSecurity;
import org.springframework.security.config.annotation.web.builders.WebSecurity;
import org.springframework.security.config.annotation.web.configuration.EnableWebSecurity;
import org.springframework.security.config.annotation.web.configuration.WebSecurityConfigurerAdapter;
import org.springframework.security.crypto.bcrypt.BCryptPasswordEncoder;

@Configuration
@EnableWebSecurity
public class SecurityConfig extends WebSecurityConfigurerAdapter {

  // 암호화 방식 빈(Bean) 생성
  @Bean
  public BCryptPasswordEncoder passwordEncoder() {
    return new BCryptPasswordEncoder();
  }

  @Override
  protected void configure(HttpSecurity http) throws Exception {
    http.csrf()
        .disable()
        .authorizeRequests()
        // user 페이지 설정
        .antMatchers("/user/**")
        .authenticated() // 로그인 필요
        // 기타 url은 모두 허용
        .anyRequest()
        .permitAll()
        .and()
        // 로그인 페이지 사용
        .formLogin()
        .loginPage("/loginForm") // 로그인 페이지 경로 설정
        .loginProcessingUrl("/login") // 로그인이 실제 이루어지는 곳
        .defaultSuccessUrl("/"); // 로그인 성공 후 기본적으로 리다이렉트되는 경로
  }
}
PrincipalDetails, PrincipalDetailsService 구현

이제 마지막으로 세션을 저장하기 위해, SecurityContextHolder에 담을 Authentication을 구현해야한다.
(Spring Security는 위 그림과 같이 SecurityContextHolder > SecurityContext > Authentication을 저장하고 있음)
com.example.security.config.auth.PrincipalDetails.java
package com.example.security.config.auth;

import com.example.security.model.User;
import org.springframework.security.core.GrantedAuthority;
import org.springframework.security.core.authority.SimpleGrantedAuthority;
import org.springframework.security.core.userdetails.UserDetails;

import java.util.ArrayList;
import java.util.Collection;

public class PrincipalDetails implements UserDetails {

  private User user;

  public PrincipalDetails(User user) {
    this.user = user;
  }

  /**
   * 해당 유저의 권한을 가져오는 메소드
   *
   * @return
   */
  @Override
  public Collection<? extends GrantedAuthority> getAuthorities() {
    Collection<GrantedAuthority> authorities = new ArrayList<>();
    authorities.add(new SimpleGrantedAuthority(user.getRole()));
    return authorities;
  }

  /**
   * 비밀번호를 가지고 오는 메소드
   *
   * @return
   */
  @Override
  public String getPassword() {
    return user.getPassword();
  }

  @Override
  public String getUsername() {
    return user.getUsername();
  }

  /**
   * 계정 만료 확인
   *
   * @return
   */
  @Override
  public boolean isAccountNonExpired() {
    return true;
  }

  /**
   * 계정 잠금 확인
   *
   * @return
   */
  @Override
  public boolean isAccountNonLocked() {
    return true;
  }

  /**
   * 계정 비밀번호 변경 확인
   *
   * @return
   */
  @Override
  public boolean isCredentialsNonExpired() {
    return true;
  }

  /**
   * 계정 활성화 확인
   *
   * @return
   */
  @Override
  public boolean isEnabled() {
    return true;
  }
}
com.example.security.config.auth.PrincipalDetailsService.java
PrincipalDetailsService.java는 로그인을 하게되면(login Processing URL),
알아서 IoC에 등록된 UserDetailsService의 loadUserByUsername() 메소드를 호출한다.
package com.example.security.config.auth;

import com.example.security.model.User;
import com.example.security.repository.UserRepository;
import org.springframework.beans.factory.annotation.Autowired;
import org.springframework.security.core.userdetails.UserDetails;
import org.springframework.security.core.userdetails.UserDetailsService;
import org.springframework.security.core.userdetails.UsernameNotFoundException;
import org.springframework.stereotype.Service;

import java.util.Optional;

@Service
public class PrincipalDetailsService implements UserDetailsService {

  @Autowired private UserRepository userRepository;

  @Override
  public UserDetails loadUserByUsername(String username) throws UsernameNotFoundException {
    Optional<User> optionalUser = userRepository.findByUsername(username);

    return optionalUser
        .map(PrincipalDetails::new) // 입력받은 username에 해당하는 사용자가 있다면, PrincipalDetails 객체를 생성한다.
        .orElse(null); // 없다면 null을 반환한다. (인증 실패)
  }
}
결과 확인
회원가입을 한 뒤에 로그인을 해본다.

로그인 후 localhost:8080/user에 접속해보면, 페이지가 정상적으로 나온다.

'Backend > Spring Boot' 카테고리의 다른 글
| Spring Boot 프로젝트에 h2 database 설정 (0) | 2021.01.05 |
|---|---|
| Spring Security의 기본 계정 아이디와 비밀번호 (0) | 2020.12.15 |
| Spring Boot - REST API를 위한 snake_case 공통 설정 (0) | 2020.11.15 |
| JPA 오류 해결 - Unable to locate Attribute with the the given name [Column] (0) | 2020.11.14 |
| Spring Boot 와 MySQL & JPA 연동하기 (Gradle 프로젝트) (1) | 2020.11.11 |