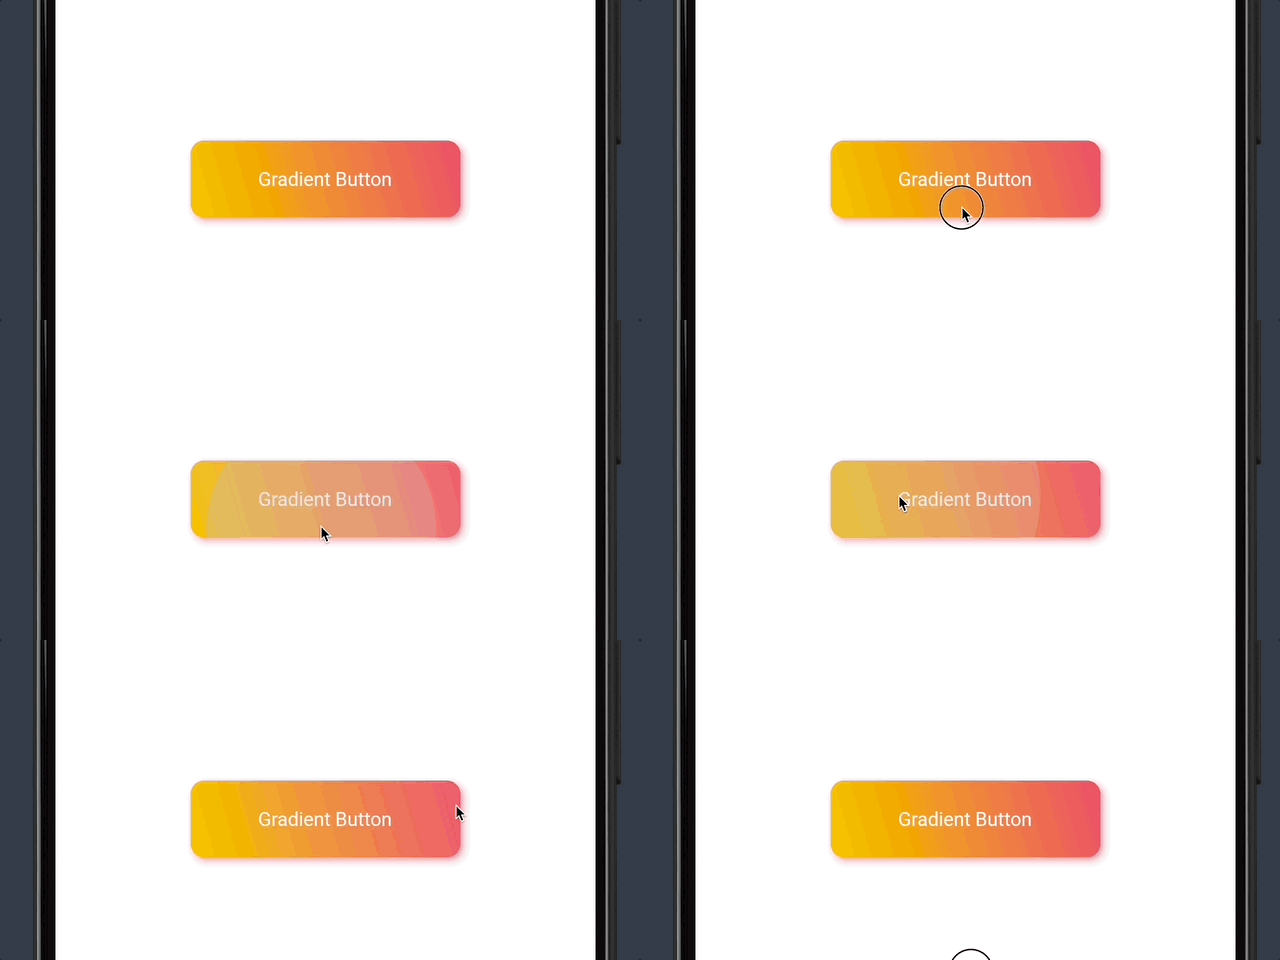
간단하게 만든다면 InkWell과 Container로 만들 수 있다.
Gradient Button 쉽게 구현
코드 구현
import 'dart:developer';

import 'package:flutter/material.dart';

class GradientButton extends StatelessWidget {
  const GradientButton({Key? key}) : super(key: key);

  @override
  Widget build(BuildContext context) {
    return InkWell(
      onTap: () {
        log("Gradient button clicked!");
      },
      child: Container(
        padding: const EdgeInsets.all(20),
        decoration: const BoxDecoration(
          gradient: LinearGradient(
            begin: Alignment.topRight,
            end: Alignment.bottomLeft,
            colors: [
              Color(0xffff6b6b),
              Color(0xfffcc419),
            ],
          ),
        ),
        child: const Text(
          "Gradient Button",
          style: TextStyle(color: Colors.white),
        ),
      ),
    );
  }
}
우선 Container의 decoration 속성에 BoxDecoration()으로 그라데이션 효과를 준다. 그리고, InkWell 위젯을 겉에 감싸서 클릭할 수 있는 기능을 만든다.
구현 화면

하지만 그냥 위처럼 간단하게 만들면, 버튼을 눌렀을때 버튼을 누르는 효과가 화면에 보이지 않기 때문에, Stack과 Material 위젯을 같이 사용하려고 한다.
Gradient Button 응용
코드 구현
import 'dart:developer';

import 'package:flutter/material.dart';

class GradientButton extends StatelessWidget {
  const GradientButton({Key? key}) : super(key: key);

  @override
  Widget build(BuildContext context) {
    return Stack(
      children: [
        Container(
          padding: const EdgeInsets.all(20),
          decoration: const BoxDecoration(
            gradient: LinearGradient(
              begin: Alignment.topRight,
              end: Alignment.bottomLeft,
              colors: [
                Color(0xffff6b6b),
                Color(0xfffcc419),
              ],
            ),
          ),
          child: const Text(
            "Gradient Button",
            style: TextStyle(color: Colors.white),
          ),
        ),
        Positioned.fill(
          top: 0,
          left: 0,
          child: Material(
            color: Colors.transparent,
            child: InkWell(
              onTap: () {
                log("Gradient button clicked!");
              },
            ),
          ),
        ),
      ],
    );
  }
}
우선 Stack 위젯으로 겉을 감싸고, Stack 위젯의 children 값으로 위에서 만든 그라데이션 버튼과 Positined 위젯을 추가한다.
Positioned.fill 값으로 남는 여백을 모두 채운다. Material 위젯으로 형태를 만들어주고, color를 transparent 값으로 줘서 투명하게 만들어준다.
그리고 child에 InkWell 위젯을 추가하여 tap을 할 수 있는 기능을 만들어준다.
구현 화면

padding 값, margin, border, radius, shadow 값 등을 같이 주면 버튼을 더 이쁘게 만들 수 있다.
응용한 Gradient Button 구현 화면


다른 글
2022.08.06 - [Mobile/Flutter] - Flutter - CircleAvatar를 활용하여 Gradient Avatar 만들기 (인스타그램 아바타)
Flutter - CircleAvatar 위젯으로 Gradient Avatar 만들기 (인스타그램 아바타)
다양한 방법으로 CircleAvatar를 사용하면, 원형의 이미지를 만들 수 있다. 인스타 그램을 보면 아바타 겉에 그라데이션 border 효과가 들어가 있다. (아래 사진 참고) 구현 방법 우선 CircleAvatar 를 사
memostack.tistory.com
'Mobile > Flutter' 카테고리의 다른 글
| Flutter MaterialApp 테마 커스텀 색상 적용 (primarySwatch) (0) | 2022.10.19 |
|---|---|
| Flutter MaterialApp 폰트 설정 (Theme로 적용 및 직접 적용) (0) | 2022.10.18 |
| Flutter - CircleAvatar를 활용하여 Gradient Avatar 만들기 (인스타그램 아바타) (0) | 2022.08.06 |
| Flutter 버전 오류 (SDK version >=2.16.0-134.0.dev <3.0.0, version solving failed) (0) | 2022.02.05 |
| cmdline-tools component is missing 오류 조치 (Flutter 플러터) (2) | 2021.10.13 |
